
How to Prepare for Your First Hair Extension Appointment
QuarkBooker Team
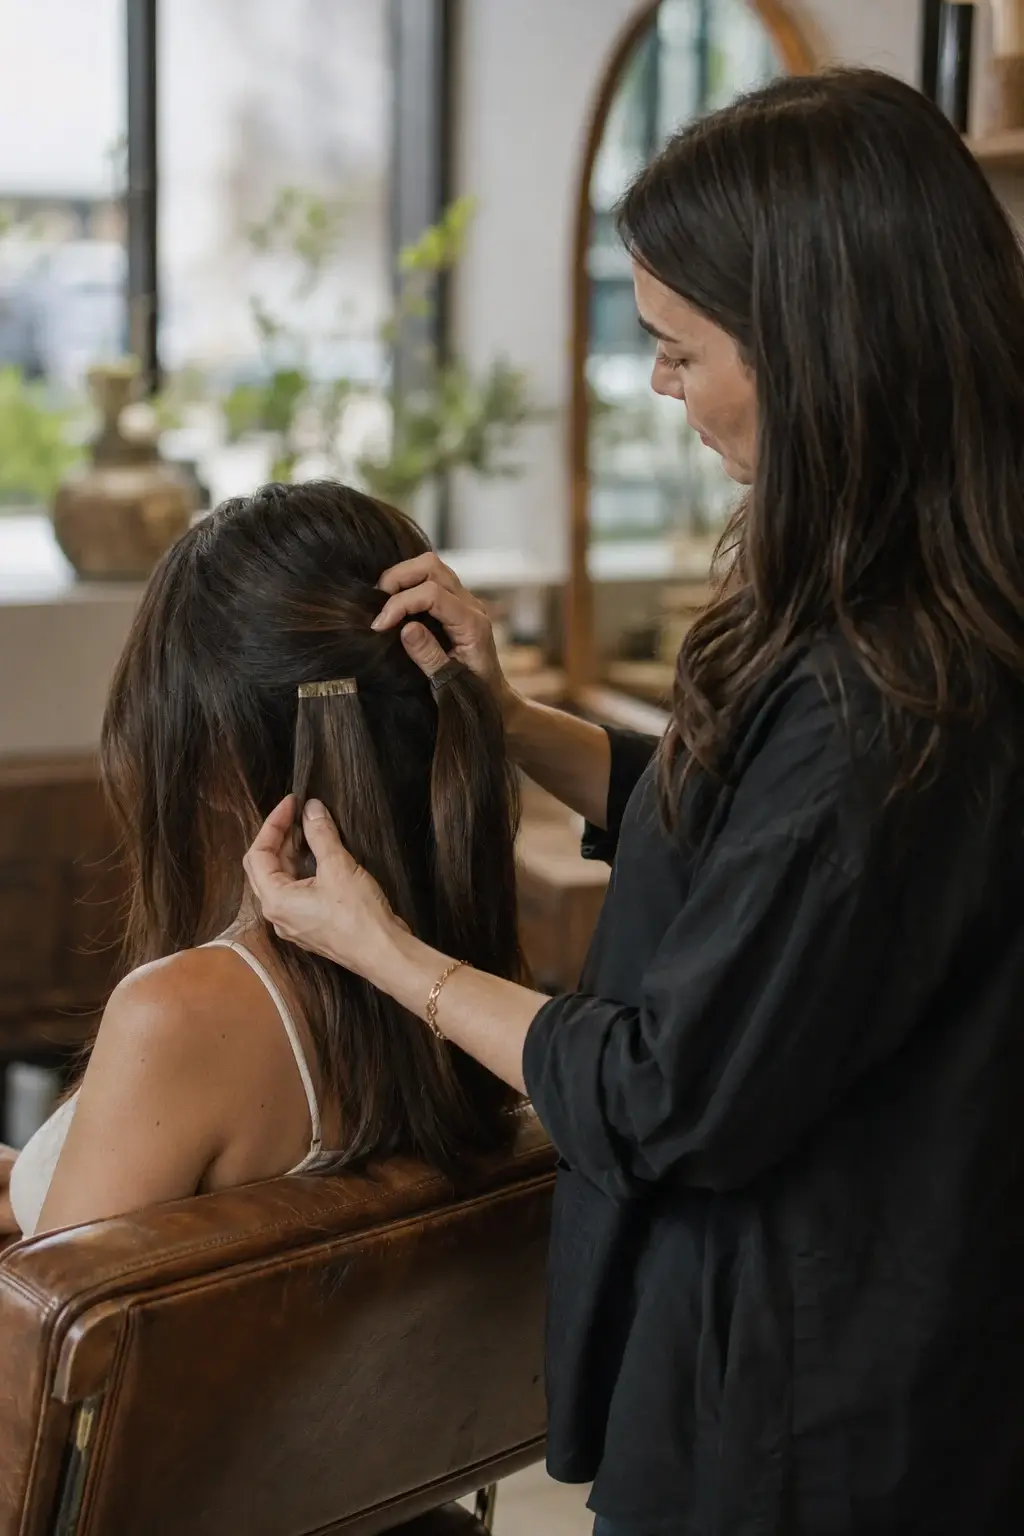
Getting hair extensions can instantly transform your look, adding stunning length, voluminous body, and a massive boost of confidence. But how exactly do you prepare for your first hair extension salon appointment? To ensure the best possible results, you should start by scheduling an in-person consultation, wash your hair with a clarifying shampoo the night before, and absolutely avoid applying any heavy conditioners, oils, or styling products near your roots on the day of your service.
This comprehensive guide covers everything from choosing the right extension method during your consultation to essential preparation steps and post-salon aftercare, ensuring your first experience is seamless and your new hair lasts for months.
Why Preparation Matters for Your Hair Extensions
Showing up to the salon unprepared can compromise the longevity of your extensions. Whether your stylist is applying tape-ins, keratin bonds, or hand-tied wefts, the application area must be perfectly primed.
Hair extensions rely on a secure anchor point—usually your natural hair near the root. If your hair cuticles are coated in product buildup, natural oils, or heavy silicones, the adhesive or beads will slip. Proper preparation ensures that your investment stays secure, preventing premature fallout and protecting your natural hair from unnecessary tension.
Step 1: The Crucial Pre-Appointment Consultation
You should never book a full installation for your first hair extension salon appointment without having a consultation first. This 15-to-30-minute meeting is where the magic starts.
During the consultation, your stylist will:
- Assess Your Natural Hair: They will evaluate your hair's density, texture, and current health to determine if it can safely support extensions.
- Color Matching: Creating a seamless blend requires precise color matching. Often, stylists will order custom shades or plan to custom-color the extensions upon arrival.
- Discuss Your Lifestyle: Do you work out daily? Do you tie your hair up often? Your daily habits dictate which method will work best for you.
- Set a Realistic Budget: High-quality extensions are an investment. A consultation provides a transparent breakdown of the hair cost, installation fee, and future maintenance appointments.
According to market research by Grand View Research, the demand for high-quality, professional human hair extensions is surging globally, making it more important than ever to consult with a certified professional rather than resorting to low-quality DIY alternatives.
Step 2: Understanding Your Extension Options
Your stylist will recommend a specific method during your consultation. Here is a quick breakdown of what you might expect to choose from:
Tape-In Extensions
Tape-ins are incredibly popular because they lie flat against the head and are relatively quick to install. Sections of your natural hair are sandwiched between two extension panels using medical-grade adhesive. They are excellent for fine or thin hair.
Keratin Bonds (K-Tips)
K-tips offer a highly customized, 360-degree range of motion. Small strands of hair are fused to your natural hair using a heated keratin bond. Much like understanding the strict differences in at-home vs. salon keratin safety for smoothing treatments, applying K-tips safely requires expert professional precision to avoid heat damage.
Hand-Tied Wefts (Sew-Ins)
Ideal for medium to thick hair, this method involves creating a foundation row using silicone beads and string, and then sewing the wefts of hair onto that track. Hand-tied wefts provide maximum volume and allow you to wear your hair up easily.
I-Tips (Micro-Links)
This method attaches extension strands to your natural hair using small copper or aluminum beads, without the use of heat or glue. The beads are clamped flat to secure the hair in place.
Step 3: Exactly How to Prep Your Hair at Home
Once your installation day approaches, what you do in the 48 hours prior is critical. Follow this professional prep checklist:
- Clarify, Clarify, Clarify: Wash your hair with a high-quality clarifying shampoo the night before or the morning of your appointment. This strips away dry shampoo, styling products, and environmental buildup.
- Skip the Root Conditioner: You can apply a light conditioner strictly to your ends, but keep it entirely away from your roots and scalp.
- Arrive with Dry Hair: Unless your stylist explicitly tells you otherwise, arrive at the salon with your hair completely dry and detangled. Installing extensions on damp hair can lead to slipping and mold issues over time.
- Avoid Chemical Treatments: Do not dye, bleach, or chemically relax your hair immediately before an extension appointment unless it is being done by your stylist as part of the scheduled service. The American Academy of Dermatology (AAD) advises against overlapping harsh chemical treatments to prevent severe breakage.
What to Expect During the Installation
A full hair extension salon appointment is not a quick in-and-out visit. Depending on the method and the amount of hair being installed, you will be in the chair for anywhere from two to five hours.
Comfort and Entertainment
Because it is a lengthy process, treat it like a mini-retreat. Bring a book, your laptop, or download a few podcast episodes. Sit back and take in the ambiance—many modern studios are embracing relaxing boho hair salon decor and design trends to make long appointments feel incredibly luxurious.
Managing Logistics
If you have a busy schedule, plan accordingly. Since appointments can take hours, you may need to arrange childcare or clear your calendar. Some progressive salons are beginning to implement pro solutions for clients with kids, but for an installation of this length, it is generally best to come solo so your stylist can focus entirely on the meticulous application process.
The Final Cut and Style
Once all the extensions are secured, the appointment isn't over. Your stylist will perform a blending cut. This is a specialized dry-cutting technique that blends your natural hair into the extensions so there are no harsh lines. Finally, they will style your new hair to perfection.
Post-Appointment: Essential Hair Extension Aftercare
Your stylist will give you a list of rules to follow. Protecting your investment requires a shift in your daily hair routine.
- The 48-Hour Rule: Wait at least 48 to 72 hours before washing your hair after tape-ins or K-tips. The bonds need this time to fully cure and set.
- Sulfate-Free Products Only: Sulfates strip natural oils and will break down extension adhesives. Only use professional-grade, sulfate-free shampoos recommended by your stylist.
- Master the Brush: Never brush your hair aggressively from the root. Hold your hair at the base of your neck and gently brush from the ends upward using a specialized extension brush (usually a loop brush or a boar-bristle mix).
- Nighttime Routine: Never sleep with wet hair, as this causes severe matting. Before bed, apply a lightweight oil to your ends and gently secure your hair in a loose, low braid. Use a silk or satin pillowcase to reduce friction. Organizations like the Professional Beauty Association (PBA) frequently highlight client education on aftercare as the number one factor in extension longevity.
Frequently Asked Questions (FAQ)
How long does a hair extension salon appointment take?
An installation appointment typically takes between 2 to 5 hours. The exact time depends on the chosen method (tape-ins are faster, while individual keratin bonds take longer) and the volume of hair being applied. Consultations take about 30 minutes.
Should I wash my hair before getting extensions?
Yes, you should wash your hair with a clarifying shampoo the night before or the morning of your appointment. Your hair must be completely dry, detangled, and free of any root conditioners, oils, or styling products to ensure the extensions adhere properly.
Do hair extensions ruin your natural hair?
When applied by a certified professional and cared for correctly at home, hair extensions do not ruin your natural hair. Damage typically only occurs from improper DIY application, neglecting maintenance appointments, or aggressive brushing.
How often do I need to move up my hair extensions?
Maintenance appointments, often called "move-ups," are required as your natural hair grows. Tape-ins need to be moved up every 6 to 8 weeks, while hand-tied wefts usually require maintenance every 8 to 10 weeks. Keratin bonds are not moved up; they are removed and replaced every 3 to 5 months.
Can I swim with professional hair extensions?
You can swim, but you must take precautions. Chlorine and saltwater can dry out extensions and break down adhesives. Before swimming, wet your hair with clean water and coat it in a leave-in conditioner. Braid your hair tightly, and wash it thoroughly immediately after swimming.
Conclusion
Preparing for your first hair extension salon appointment doesn't have to be overwhelming. By communicating clearly during your consultation, showing up with properly clarified hair, and committing to the required aftercare routine, you are guaranteeing a beautiful, long-lasting result.
Behind the scenes, top-tier salons rely on streamlined technology to make sure lengthy services like hair extensions run smoothly. Modern salons often use advanced booking and management platforms to automate their operations, manage their specialized inventory, and drastically reduce costly no-shows. If you are looking to elevate your salon's efficiency and client experience, explore the tools available at https://app.quarkbooker.com/register.